*This post may contain affiliate links, meaning if you choose to purchase something through this link, I may receive a small commission at no extra cost to you. Happy reading 🙂 *
Colour pencils are a popular and easy medium to use for creating works of art. We’ve been experimenting with them before we could even string together a sentence. Those of us who went on to dabble deeper into the art realm know that some of the techniques we use with colour pencils today are much more developed. From layering and burnishing to blending with oils and solvents, the methods are vast and the outcomes for each unique. Some of them are explained below.
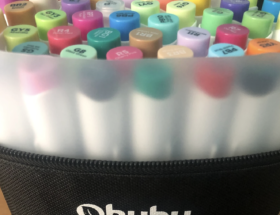
Today, we’re going to explore blending with solvents. In the art world, each medium has its kingpins. For colour pencils, it’s the Prismacolours or the Faber Castell Polychromos. For those with a little more cash to splash, the Caran d’ache Luminance is a must! Considering alcohol markers – everyone knows Copics take the crown but if you’re on a budget the Ohohu’s make a good alternative. When it comes to solvents, the Zest it Pencil Blend is a favourite.
What is the Zest it Pencil Blend?
Zest it Pencil blend is a non-toxic, non-flammable solvent. Solvents dissolve substances, so when used in art, they help to blend colour pencils together to achieve a seamless transition from one colour into another. As well as colour pencils, it can also be used to blend crayons, oil pastels and graphite.
Pro’s and Con’s

Does the zest it Pencil Blend make much of a difference?
Below is a strawberry study I did using the Zest it Pencil Blend. You can see that before the solvent was applied, the tooth of the paper was very visible, giving the image a grainy appearance. The difference the blender makes is very clear. The tooth of the paper melts away and the colors instantly become richer. What’s more, I was able to add further layers of colour pencil to achieve a vibrant final outcome.

Can’t I just blend with colour pencils alone?
The short answer – of course. Burnishing and layering with colour pencil achieves equally stunning results. However, in the long run, solvents may be the smarter option. Let me explain.
So remember how I listed ‘high price point’ as a con? Well, this may work in your favour. Yes, the upfront cost for the Zest it pencil blend may be a bit much – I know I was reluctant to part with my £10.46, squinting through closed eyes as I pressed confirm purchase. However, when I thought about how quickly I go through my colour pencils with the burnishing method and considered having to replace my sets frequently I decided this was a wise investment. With the solvent, a little really does go a long way, so I found myself wearing down less of my pencils and lengthening their life span. The longer their longevity, the less I had to spend and we all know replacing pencil sets can add up – especially the premium ones.

How steep is the learning curve?
There are a few things you need to know before using the Zest it Pencil Blend so you can avoid ruining your art. There’s nothing more frustrating than spoiling a work in progress that you’ve spent ages on – trust me I’ve learned the hard way. So to help you steer clear of any mishaps, here are some top tips:
- Less is more: When applying with a paintbrush, wipe the excess off on the inside of the bottleneck a few times, then before applying it to your paper, dab either side of the paintbrush on some tissue paper to blot off any remaining liquid. This ensures you don’t end up with oversaturated paper.
- Use circular motions: I find a paintbrush to be the most useful application tool. When applying it, small circular motions work best as it allows you to control the spread of the solvent.
- Apply enough colour: Before blending with solvent, it is important to lay down enough colour pencil. If you have too light a layer, your solvent will struggle to find anything to blend and you will end up with a grey wash.
Final Thoughts
The Zest it Pencil Blend, in my opinion, is a worthwhile investment – especially for those who use colour pencils as their main medium. The pro’s far outweigh the cons. The smell – which I initially found slightly strong is solved easily with ventilation and if you’re not a fan of the citrus scent they have a citrus-free version.
I enjoy being able to achieve a smooth underpainting effect that I can build multiple layers of colour pencil on. Once I finish the piece, I find that the final image has a subtle gloss finish.
Lastly, of course, seeing as I am a frugal gal, it doesn’t hurt that I’m able to extend the lifespan of my precious colour pencils. We all know if you want quality art you have to buy quality materials and these Prisma Colours and Fabercastells aren’t the cheapest on the market!
Wanna give it a try? Grab yours here.


